Frequently Asked Questions
UV is known to be an effective disinfectant due to its strong germicidal (inactivating) ability. As water runs through the UV reactor it is exposed to UV light that the lamp gives off, causing a genetic change in any microorganisms that are present in the water.
In simple terms, when a microbe is directly exposed to the UV light, the DNA (its fundamental building block) of the cell is damaged, preventing replication. If a cell cannot reproduce, then the cell cannot cause infection.
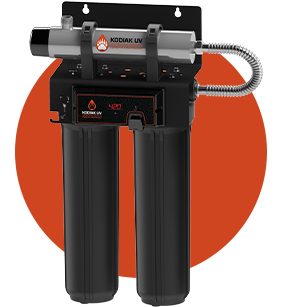
The included filter cartridges in KODIAK UV Rack Systems can improve both the taste and odour of your water. However, as these filters remove particulates and chemicals from your water they need to be replaced periodically to ensure maximum performance.
Yes! If your local state or provincial regulations allow, the installation of a KODIAK UV system can easily be done by the homeowner if they are comfortable with some basic plumbing work.
At a minimum, you will need:
- tools to cut your existing plumbing
- soldering tools (torch, flux, etc.)
- wrench (for tightening fittings)
- inlet / outlet connections
- Teflon™ Tape
- cotton gloves
- a GFCI plug for powering the KODIAK system
A basic installation guide is included with each KODIAK UV system.
A UV system installed in your home acts as "insurance for your water supply." Although most municipalities provide bacteriologically safe water to homeowners, and this is closely monitored by most provincial, state, or other regulators, there have been numerous instances around the globe where water has been provided from the municipality that may not be safe. Additionally, municipal water infrastructure is prone to contamination along pipes leading to your home, as this infrastructure can be over 50 years old! A point-of-entry UV system can give you confidence in the quality of your home's water.
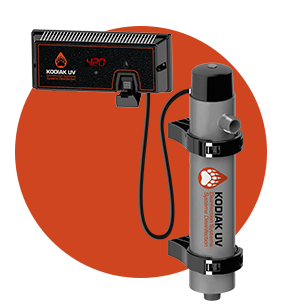
KODIAK UV Systems are designed to be point-of-entry systems, meaning they should be installed in your home where your water line enters. This ensures that all the water in your home is treated. UV should also be done as a final "polishing" step; the last step in your water treatment setup after a softener or filter system, before your hot/cold split.
Your KODIAK UV system will always display the lamp-life days remaining on the front of the controller. Additionally, a soft blue glow can be seen from the top of the lamp connector. That is your UV system working!
Your lamp key is stored inside the head of the lamp to keep it secure during shipping. This is removed from the lamp and inserted in your controller during installation. Refer to the manual for specific steps.
Basic Troubleshooting
The system will sound an alarm and will scroll the error across the screen when an alarm is active.

The system has detected a problem with the lamp.
Solution: Reset lamp protection circuit – unplug unit for 10 seconds. Replace the lamp with the part indicated on the silver label on the chamber.

Although the lamp is powered and visibly illuminated, due to the lamp’s age its UV output is no longer sufficient for proper disinfection.
Solution: Replace the lamp with the part indicated on the silver label on the chamber.

The wrong lamp is installed.
Solution: Replace lamp with the correct model as indicated on the silver label on the chamber.

The lamp key is missing or incorrect.
Solution: Ensure the lamp key (packaged with the lamp) is installed. Unplug and reinstall the key. Ensure the key part number matches Lamp on the silver label on the chamber.
Your KODIAK controller will display the “LAMP EXPIRED” alarm when the UV lamp is at the end of its life. Replace the lamp using these steps:
- Shut the inlet valve off to prevent water flow through the system. Otherwise, turn off the water pump.
- Disconnect the power cord of the UV system from electrical outlet.
- Twist the lamp in the counter-clockwise direction indicated by the arrows. CAUTION: The lamp may be hot!
- Being careful to only touch the plastic ends, remove the lamp out of the chamber.
- Remove the new lamp from packaging. Remove the lamp key from the head of the lamp and insert into the controller as shown in the Installation steps. Be careful not to touch the key’s exposed contacts. Ensure that the arrows align on the socket and the top of the lamp and insert the UV lamp into the chamber, and twist to lock into the socket connector.
Depending on water quality, the quartz sleeve may require periodic cleaning. At a minimum, the quartz sleeve should be cleaned on an annual basis. The following steps outline a basic cleaning procedure.
- Shut the inlet valve off to prevent water flow through the system. Otherwise, turn off the water pump.
- Disconnect the power cord of the UV system from electrical outlet.
- Release any water pressure by opening a downstream faucet and then close the outlet shut-off valve (if any). If there is no outlet shut-off valve, expect water to drain from the system as the head pressure in the system will cause the water to flow back down.
- Twist the lamp in the counter-clockwise direction indicated by the arrows. CAUTION: The lamp may be hot!
- Being careful to only touch the plastic ends, remove the lamp from the chamber.
- Unscrew the gland nut from the chamber exposing the end of the quartz sleeve.
- Remove the quartz sleeve and O-ring by gently twisting and pulling the sleeve.
- Using a soft, lint-free cloth or towel wipe the sleeve down using a commercial scale cleaner (i .e. CLR® or LIME-A-WAY®). This removes scaling or iron deposits that may be on the outside of the quartz sleeve. Be careful not to get any moisture or liquids inside of the sleeve.
- Dry the sleeve with separate cloth.
- Replace the O-ring and slide the sleeve back into the chamber following Step 7 from the Installation section of the manual.
- Ensure lamp contacts are dry before restarting system.